Using the Asset Map |
There are several useful tips when it comes to using the asset maps. When using the asset map, there are multiple ways to see the map including the computer with a mouse or keyboard, and on mobile devices. Read through the tips below to find out more on how to use the asset map, or click a bookmark from the following list to jump to that section:
Moving Around the Map
Zooming
You can zoom in or out in the asset maps in several different ways. Follow the steps below to zoom in or out with either a mouse, a touch device, or a keyboard. You can also zoom using the zoom box. Refer to the procedures in Using the Zoom Box section for information on the zoom box.
To zoom in or out:
-
Mouse
-
Scroll the mouse wheel up or down to zoom in and out.
-
 Click the zoom buttons to zoom in or out.
-
Touch pad
-
Using two fingers, touch the screen and either move the fingers together in a pinching motion to zoom out, or move your fingers apart to zoom in.
-
Click the zoom buttons to zoom in or out.
-
Keyboard
To use the keyboard keys for zooming, the map must be the active element on the page (click inside the map to make it the active element).
-
Push + to zoom in
-
Push - to zoom out
Using the Zoom Box
The zoom box allows you to zoom into a specific area or chose multiple assets when creating or updating a multi-asset work order. You can select a zoom area or multiple assets by drawing a box around the area.
To zoom in using a zoom box:
-
Press and hold Shift.
-
While holding Shift, click in the map and drag your cursor to make a box around the area you want to zoom.
-
Release the buttons. This will zoom in on the specified area.
To select multiple assets when creating or updating a multi-asset work order:
-
Press and hold Shift.
-
While holding Shift, click in the map and drag your cursor to make a box around the assets you want to select.
-
Release the buttons. This selects the assets you want for your work order.
Panning the Map
You can move the map around in the gadget to see different areas. Follow the steps below to pan around the map using a mouse, a touch device, or a keyboard.
To pan around the map:
-
Mouse
-
Click and hold anywhere on the map. Drag the map to show the area you want, and release the button.
-
Touch
-
Touch the map and drag your finger to move the map.
-
Keyboard
-
Press the arrow keys of the direction you want to scroll.
Search Addresses and Features
Search for an Address
Use this search to find a certain address in the asset map.
To search for an address:
-
Type an address into the Address Search field.
-
Press Enter, or pause for a moment for the results to be found.
-
Tip: Include the name of the city to further narrow results.
Pinning an Address
To zoom to or pin an address:
-
Mouse
-
Click one of the results after performing an address search.
-
Keyboard
-
Use the up and down arrow keys to navigate the results.
-
Press Enter when the result you want to see on the map is highlighted.
Other Map Functions
Printing the Map
You can print the map for easier viewing, or for taking with you on the road.
To print the map:
-
Click the Printer icon.
-
Change the print settings as needed.
-
Click Print.
-
Note: For best printing with Internet Explorer and Firefox (to print all markers and map components), use the settings on File > Page Setup menu to enable printing background colors and images. You can set this up and turn this off before and after printing if necessary. Failure to enable this setting may result in improper output.
Changing the Visible Map Layers
You can change the different visible map layers by checking them on or off from the map layers tab.
To change the visible map layers:
Go to the Layers tab. Check the box next to the layer you would like to view. This will display the defined filters for that layer on the map. Uncheck the box to hide the layer.
To add or edit a layer:
-
Click Add Layer.
-
Fill in the desired fields for the filter.
-
Click Save.
Scale Bar
A scale bar is located in the bottom left area of the map. This scale bar is based on the level of zoom on the map. This is just a quick reference to approximate the distance within the map.
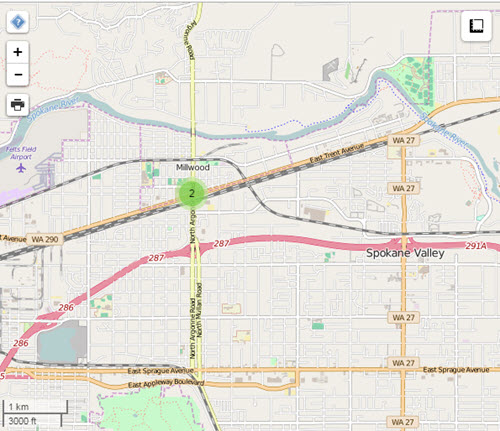
Viewing Clustered Features
Clusters are used when multiple map features are close together when the map is zoomed out. Clusters can also happen where map features occur at the exact same location. For example, multiple assets could occur at the exact same coordinate when multiple service requests or work orders are assigned for a point asset. To view these clusters, follow the steps below.
To view a cluster of features in different coordinate points:
-
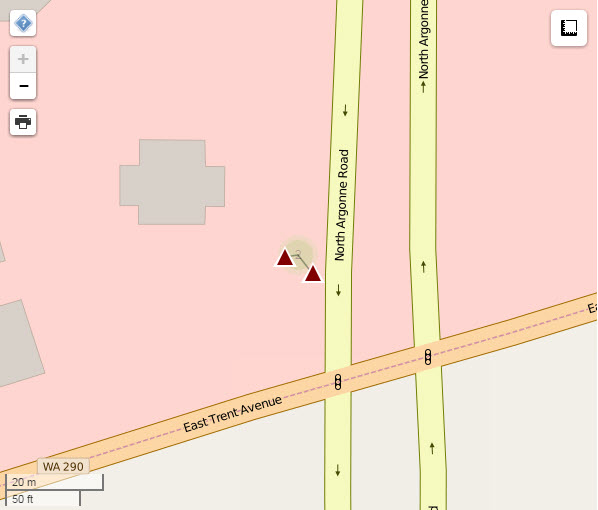
To zoom in on a cluster, click the cluster.
-
This breaks the cluster into its different groups and zooms in to show all the previously clustered items in their coordinate points. These groups can be single features or clusters of features in the same coordinate point.
-
-
Click on a feature to view its information.
 |
 |
|
| This is a cluster on a zoomed out map. | After clicking the cluster, the cluster breaks into its separate groups and zooms into the smallest area on the map that will show each item. |
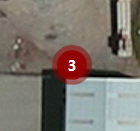
To view a cluster of features that are at the same coordinate point:
-
To zoom in on a cluster, click the cluster. If the cluster is a group of features in the same location, the map zooms in on the cluster to show its coordinate point.
-
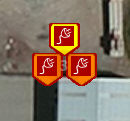
Click the cluster again to show the exploded view of the different features in that point.
 |
 |
|
| This is a cluster. The number on this feature cluster shows how many features are included in the cluster. | When there are several features at the exact same coordinate point, you have to expand the cluster to see them all. This is a an exploded view of the cluster showing all the features in that coordinate point. |
Viewing Information About a Map Feature
Each feature on a map is linked to more detailed information. Click a feature to open its information page.
To get information about a map feature from the web portals:
-
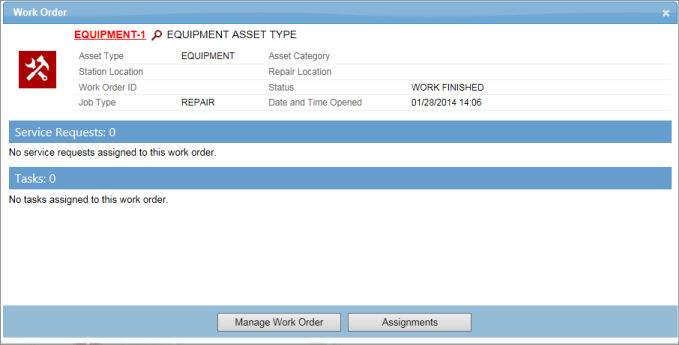
Click on the map feature. This opens the information pop-in for the item.
-
If you click the red asset link, you can see this information in the corresponding Enterprise Portal screens, in the record detail pane.